Introduction to Static Site Generators
This tutorial will teach you the basics of using a static site generator. We will be using Hugo to build our demonstration site. We’ll play the role of a scholarly communications librarian. We’ll be using a command line terminal to install software and run commands and a text editor to edit and save plain text files. This in-depth tutotial is estimated to take between three and four hours to complete.
While we will be using Hugo as our static site generator, this tutorial is not intended to be a cover the depth and breadth of Hugo. For that, I refer you to the Hugo documentation and community. Rather, this tutorial is about using static site generators in a library-publishing context.
Outline:
There’s an academic department that is hosting a conference on campus. You approach them about depositing conference presentation materials in the institutional repository. The conference will feature research papers, posters, and a data visualization contest. The conference organizers are unimpressed by the look and feel of the institutional repository. They’re worried that the conference material will get “buried” among the other types of content in the repository. They want their web presence to look like a professional publication with a custom web address. They also want the text of the papers to display on the page in addition to PDF downloads.
Institutional repositories can be useful systems for storing and providing long-term public access to documents. They provide obvious benefits to libraries, but faculty and students might struggle to see those benefits. Unfortunately, the complexity of repository systems make them difficult or prohibitively costly to customize for specific collections or content types. It’s also generally not a good idea to customize repository systems for edge cases.
Creating a separate website with platforms like WordPress or Drupal can be costly in terms of maintainance (and eventual content migration). We want to avoid unscheduled downtime and urgent security patches. In addition to requiring someone to manage the website contents, someone else (usually an IT administrator or vendor) needs to set up a server with application software and a database. Overtime, the server will need – at a minimum – software patches to secure the database and user credentials. You can’t afford to pay a vendor for hosted solution and you can’t get the commitments from IT managers to help you spin up and maintain a new web service.
Static websites can provide custom presentation features for collections stored in a repository. They can be a supplemental publishing layer for a digital repository system without the maintenance overhead of traditional websites. Without a database or cloud-based application software, the security and maintance costs are avoided. We can think about static websites as an additional layer of publishing services to our patrons:
- Digital Repositories: Institutional storage layer
- Static Websites: Collection-level presentation layer
Recommended Reading: Becker, Devin, Evan Williamson, and Olivia Wikle. 2020. “CollectionBuilder-CONTENTdm: Developing a Static Web ‘Skin’ for CONTENTdm-Based Digital Collections.” The Code4Lib Journal, no. 49 (August).
- This article discusses the University of Idaho Library’s use of static websites as collection-level presentation layers for their CONTENTdm digital collections system.
Static websites are good options for stable content that doesn’t need continuous, on-the-fly updates. They’re a great solution for publications that are fixed in time (e.g. academic monograph), updated annually (e.g. open textbook), or semi-annually (e.g. academic journal). Considering the importance of web technologies to open access publishing, site site generators present a good opportunity for scholarly communications librarians to learn about web standards and best practices.
In this tutorial, we will make a conference proceedings website that links to content stored a repository. Together, the website and the repository will provide stakeholders with a full-featured, preservation-ready scholarly web publication.
Although we will be using Hugo to build our website, our goals can be achieved using any static site generator. While other static site generators are designed with blogs, technical documentation, and e-commerse in mind, Hugo is a general-purpose website building tool with cross-platform compatibility. It has a growing user community and can easily scale to support websites with thousands of pages, which is partly why it’s the basis for some book publishing tools.
There are two main types of documents we use to write and edit text: plain-text and rich text. Plain text exposes the raw, semantic characters within a document, whereas rich text displays the formatting features and styles.
| File Contents | File Extension | Editors |
|---|---|---|
| Plain text | .xml, .html, .md | Notepad, TextEdit, VS Code |
| Rich text | .docx, .rtf, .odt | Microsoft Word, Scrivener |
Most of us are trained to use rich text editors: emails, word documents, content management systems. This is for good reason: they’re easy to use and we need them for everyday things. For scholarly communications purposes, plain text offers some advantages over rich text, as Tenen and Wythoff (2014) explain:
Plain text both ensures transparency and answers the standards of long-term preservation. MS Word may go the way of Word Perfect in the future, but plain text will always remain easy to read, catalog, mine, and transform. Furthermore, plain text enables easy and powerful versioning of the document, which is useful in collaboration and organizing drafts. Your plain text files will be accessible on cell phones, tablets, or, perhaps, on a low-powered terminal in some remote library. Plain text is backwards compatible and future-proof. Whatever software or hardware comes along next, it will be able to understand your plain text files.
Coming to a plain text editor from a word processing program (like Microsoft Word), might feel like writing computer code rather than text for humans. That is because there is little material difference between plain text and code. Plain text is the format software developers use to write code. The only differences between code and text is the content and file extension. Plain text editors are not exclusive to writing code or reading data; people can write fiction in plain text (and some do).
Static site generators use plain text in order to separate content from styles. Static site generators use Markdown as the plain text markup language to express semantic formatting, such as headings, paragraphs, links, lists, and references, and YAML for metadata, such as title, author, abstract, date.
Markdown uses a syntax that prioritizes human readability without sacrificing semantic structure. There are numerous tools available that will convert markdown to other formats, such as .html, .docx, .pdf, .tex, .epub, .jats, .tei, etc. The most popular markdown conversion tool is Pandoc.
Static site generators all have markdown processors to generate .html. Below is a comparison between the markdown input and the HTML output that static site generators make. Click “HTML Output” in each example to see the HTML output.
Markdown input: Headings
# Site Title (Heading 1)

## Page Title (Heading 2)

### Section Heading (Heading 3)

#### Subsection Heading (Heading 4)
Basic Emphasis with Bold and Italics
This is **bold**.

This is _italics_.
Markdown input: Links and Images
This is [a link](https://example.com)
This is an Image:


Markdown input: Two Paragraphs and a Footnote with a link
Bounding ahead in panic surged hundreds of animals of a strange
species. Shaped like deer, they had no antlers and their delicate
bodies were covered with rich greenish-gold feathers. Eyes large with
terror, feathers ruffled, they stampeded through the entrance of a
corral that was so well camouflaged it was almost invisible in the
tangled plants and tree trunks.[^1]

In a corner of the corral, shadowed from the late afternoon sun, a
tall, bare-chested young man waited motionless as an ironwood tree,
watching the animals stream toward him. His only clothing was a pair of
faded khaki shorts and soft leather boots.

[^1]: Excerpt from [_Space Bat_ by Carl Selwyn](https://www.gutenberg.org/ebooks/63808), courtesy of Project Gutenberg.
There are many markdown tutorials and guides available online.
Document metadata is embedded within markdown documents with YAML front-matter. The YAML metadata block always appears at the top of the file preceeded and followed by three hyphens ---. YAML is a plain text syntax for representing data as key-value pairs. MARC, DublinCore, and RDF are library examples of key-value pairs for bibiliographic metadata.
YAML front-matter example for an article:
---
title: Using Static Site Generators for Scholarly Publications and Open Educational Resources
author: Chris Diaz
date: 2018-11-08
journal: Code4lib Journal
issue: 42
abstract: Libraries that publish scholarly journals, conference proceedings, or open educational resources can use static site generators in their digital publishing workflows. Northwestern University Libraries is using Jekyll and Bookdown, two open source static site generators, for its digital publishing service. This article discusses motivations for experimenting with static site generators and walks through the process for using these technologies for two publications.
---
YAML syntax is strict; invalid YAML will break your website. There are a lot of online YAML validation tools you can use if you ever see an error you don’t understand.
One common issue with writing YAML is dealing with punctuation. If any of your YAML values include punctuation, put the entire value in single quotes ('') or double quotes (""). If the value includes double quotes, wrap the value in single quotes (and vice versa). This will make it explicit to the static site generator that the value is a string (usually, YAML parsers can make this determination, but the quotes will make it explicit). For example:
This will break your website:
title: Dr. Strangelove or: How I Learned to Stop Worrying and Love the Bomb
This is valid way to store the value:
title: "Dr. Strangelove or: How I Learned to Stop Worrying and Love the Bomb"
If you’re interested, this is an excellent self-guided workshop to anyone interested in refreshing their knowledge on web fundamentals (i.e. HTML, CSS, JavaScript):
Williamson, Evan. 2019. “Web Crash Course! An Intro to Basic Web Concepts Using GitHub and GitHub Pages.” Web-Crash-Course. 2019.
There are a lot of text editors we can use to build static websites. Every operating system includes a default plain text editor. Notepad is the default text editor on Windows machines; TextEdit is the default text editor on macOS. Either can be used to write and edit markdown and YAML.
Selecting a text editor is a matter of personal preference. Most modern text editors can be customized with plugins, themes, and extensions to streamline the workflow and comfort of writing plain text. Syntax highlighting and validation are especially helpful. I recommend Visual Studio Code (VS Code). It’s free and open source with good documentation and a lot of helpful extensions for writing markdown and using static site generators. For this this tutorial (and working with the Hugo static site generator in the future), I recommend installing the Hugo Language and Syntax Support extension.
Static site generators are command line programs that you can run from a computer terminal. Depending on your system, the default program for your terminal interface might be called Command Prompt if you’re on Windows or Terminal if you’re on macOS. There are many terminal programs available and they each give you direct access to files and folders on your system.
Here’s how to open your default computer terminal program:
- Click on the
Startbutton - Type
cmdselect the search result for theCommand Promptprogram
This will open your terminal to your User’s home directory. Here are three important commands to help you navigate your system:
| Command | Explanation |
|---|---|
dir | List the contents of your current directory |
mkdir | Make a new directory (or folder) called new-folder by running mkdir new-folder |
cd | Change directories to a target folder by running cd path\to\new-folder |
- Find the
Terminalprogram by looking in theUtilitiesfolder on your computer
This will open your terminal to your User’s home directory. Here are three important commands to help you navigate your system:
| Command | Explanation |
|---|---|
ls | List the contents of your current directory |
mkdir | Make a new directory (or folder) called new-folder by running mkdir new-folder |
cd | Change directories to a target folder by running cd path\to\new-folder |
- Find the
Terminalprogram by looking in theApplicationsfolder on your computer
This will open your terminal to your User’s home directory. Here are three important commands to help you navigate your system:
| Command | Explanation |
|---|---|
ls | List the contents of your current directory |
mkdir | Make a new directory (or folder) called new-folder by running mkdir new-folder |
cd | Change directories to a target folder by running cd path\to\new-folder |
You will need administrator priviledges on your machine to install and configure Hugo. Here’s a helpful video on installing Hugo on Windows.
- Open Windows Explorer
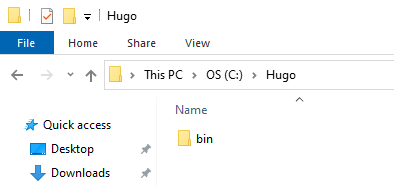
- Create a new folder at the root of your
CDrive and call itHugo:C:\Hugo - Create a subfolder in the
Hugofolder calledbin:C:\Hugo\bin
- Download the latest
.zipfile for the Windows operating system from the Hugo Releases page. It will be a file that looks something like:hugo_x.xx.x_Windows-xxbit.zip. Here’s how to check if your running a 32-bit or 64-bit version of Windows.

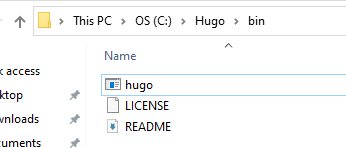
- Extract all of the contents of the
.zipfolder to theC:\Hugo\binfolder you already created.
- Click on the
Startbutton. - Type
Environment Variablesand select the search result forEdit the system Environment Variablesfrom the Control panel - Click on the
Environment Variablesbutton - In the
Systemvariables section, find the row that starts with PATH (PATH will be all caps). - Double-click on
PATH. - Click the
Newbutton. - Type in the folder path in which the
hugo.exewas saved:C:\Hugo\bin. ThePATHentry should be the folder where Hugo lives. PressOKwhen you’re done typing. - Click
OKat every window to exit.
- Open the
Command Prompt - Type in
hugo versionand pressEnter- If the installation is successful, the output will display the version of Hugo you’ve installed.
- If this doen’t happen, then verify that the folder location of the
hugo.exefile has been added to yourPATHEnvironmental Variables in your Advanced System Settings (see: above).
Here’s a helpful video on installing Hugo on macOS.
The easiest way to install Hugo on macOS (and lots of other open source software) is using the Homebrew package manager. Homebrew will download, install, update, and remove software packages with a few simple commands.
The most up-to-date instructions will be available on the website, but here are the steps:
- Open a Terminal
- Copy this code and paste it into the terminal:
xcode-select --install
- This will install Apple developer tools. You might get a message that this is already installed, and that’s OK. Once that’s done, copy and past this code into the terminal:
/bin/bash -c "$(curl -fsSL https://raw.githubusercontent.com/Homebrew/install/master/install.sh)"
- This will install and set up Homebrew on your machine. You might be prompted to enter a password. This is the password you use to log into your machine.
- Now that you have Homebrew, you can install Hugo by running this code in your Terminal:
brew install hugo
After installing Hugo, run this code in your terminal:
hugo versionIf the installation is successful, the output will display the version of Hugo you’ve installed.
The easiest way to install Hugo on Linux (and lots of other open source software) is using the Homebrew package manager. There’s good change that hugo is available in your distributions default package manager, but Homebrew tends to have the most recent Hugo releases. Homebrew will download, install, update, and remove software packages with a few simple commands.
The most up-to-date instructions will be available on the website, but here are the steps:
- Open a Terminal
- Copy this code and paste it into the terminal:
/bin/bash -c "$(curl -fsSL https://raw.githubusercontent.com/Homebrew/install/master/install.sh)"
- This will install and set up Homebrew on your machine.
- Now that you have Homebrew, you can install Hugo by running this code in your Terminal:
brew install hugo
After installing Hugo, run this code in your terminal:
hugo versionIf the installation is successful, the output will display the version of Hugo you’ve installed.
Files and folders account for the materiality of static websites before and after they are built. Traditional websites, on the other hand, are databases and servers that dynamically responds to requests from a content management system or web browser.
Static site generators do not use content management systems. They don’t have a graphical user interface and they don’t need a database. As far as we’re concerned, they’re a command we execute in a terminal that performs a transformation on a set of files and folders.
The files and folders we use to build the website are diffent than the files and folders we use to publish the website. Most of our editing and management of the site is within a working directory of files and folders. Once we’re ready, we run a command in our terminal and the static site generator handles the tranformation between the our working directory of files and folders and our output directory of ready-to-publish website files.
Here’s a comparison between the files and folders for a basic hugo project, before and after transformation (the default output directory in a Hugo project is called public):
We use the working directory to store and edit our project files. Once we’re finished, we run the hugo command from our terminal.
This creates a new directory called public containing our website files. These are the files we copy over to a web host to make our website available online.
Task: Download the exercise files from GitHub. You can download the zip file and extract them to a directory you can easily access on your machine, such as your “Documents” folder.
The exercise files contain the working directory for a Hugo project. The Hugo software not only provides a process for building websites, it also provides a local web server we can use to preview our websites before we build the final versions. After following these steps, you should be able to build and preview a functional website on your computer with Hugo.
- Open the Folder for the exercise files in VS Code:
File > Open folder...; you should see the contents of thestatic-web-scholcomm-exercise-filesfolder in the left sidebar of VS Code - Open a Terminal in VS Code: Title menu >
Terminal>New Terminal - Start the Hugo server to preview the website by entering this command into the terminal:
hugo server - Open a web browser and visit:
http://localhost:1313
You should now see a website template for the conference proceedings we’re going to make. If you see a website, this means that Hugo is installed on your computer and the files are rendering properly on your machine. While you work with static site generators, it’s always nice to have the option to preview your updates locally before pushing changes to a server. With the Hugo server running, any changes to working directory files with automatically trigger a rebuild of the site for you to preview in a web browser.
If you got an error running the
hugo servercommand, there might have been a problem installing Hugo and adding thehugo.exefile to yourPATHvariable. Re-try the installation steps. If that doesn’t work, search the web for error messages to troubleshoot the issue. There’s always a good chance someone else has run into the same problem!
The exercise files contain the starter files for a basic Hugo project. The folders are organized in a way that separates content from layouts and styles.
Most people who use static site generators create and edit the Markdown files in the content folder (/content/) and edit the settings in the configuration file (config.yml). The Markdown files in the /content/ folder contain all of the text of the website, whereas the configurations in the config.yml contain site-wide settings, such as the website title.Each theme you use will have it’s own configutation settings in the config.yml file (good themes document what each setting is for!). The other folders in the working directory are used for more advanced features and customizations. For example, the layouts and styles are usually set by a theme. Themes are usually developed for a specific use case (e.g. blog, portfolios, documentation, e-commerce) with features (e.g. search, image galleries, CSS framework support).
The most popular static site generators have numerous themes available for people to use and customize in their websites. The Hugo community has published a lot of themes for anyone to use with their websites. In this tutorial, we’ll be using a simplified version of the Hugo Bulma theme and the Bulma CSS framework.
The first file we’ll edit is the configuration file: config.yml. Hugo allows you to write your configuration files in YAML, JSON, or TOML. Each of these languages have slightly different syntaxes, but they both perform the same functions: storing site-wide settings.
Task: Open theconfig.ymlin a text editor, change thetitle,description,institution, andpublisherfor the conference to the following values:
| Attribute | Value |
|---|---|
title | Proceedings of the Society of Workplace Jargon |
description | Presentations from the annual conference of the Society for Workplace Jargon |
institution | University College |
publisher | University College Library Press |
When you’re done, save the file (Ctrl S). You can check out the changes in a web browser. If your local server is still running and the browser is already open to http://localhost:1313, the changes should already be there. If not:
- Open a Terminal in VS Code: Title menu >
Terminal>New Terminal - Start the Hugo server to preview the website:
hugo server - Open a web browser and visit:
http://localhost:1313
For more information, see: Hugo Documentation: Configuration
Task: Create the Data Visualizations section of the website by adding a new section to the website.
- Find two (or more) public domain or Creative Commons licensed images of data visualizations in Wikimedia Commons. With the Advanced Search, you can fiter by file type to return only images. Keep them open as tabs in your browser.
- Create a folder called
visualizationsas a subfolder of/content/ - Create one Markdown file (
.md) for each visualization you plan to include and add the file to thevisualizationssubfolder - Copy and paste this YAML metadata block at the top of each Markdown file:
---
title:
authors: ["first_name last_name", "first_name last_name", "first_name last_name"]
date:
abstract:
image_src:
image_alt:
# License options are: by, by-nc, by-nc-nd, by-nc-sa, by-nd, by-nd-nc, by-sa, public domain
# See Creative Commons website for more info: https://creativecommons.org
license:
---
- Add in values for each of the metadata fields within the YAML metadata block. See below for instructions on how to format the values for each field.
Here’s a mapping of Wikimedia image metadata and metadata we’re using on the site:
| Wikimedia | Website |
|---|---|
title | File name |
authors | Creator. Make sure that all creators are listed within brackets and quotations, separated by commas if there are more than one. For example, a single creator would look like ["first_name last_name"] whereas multiple creators would look like ["first_name last_name", "first_name last_name", "first_name last_name"]. Organization names, such as NASA/JPL/Cornell University just need to be separated by commas, e.g. ["organization name", "organization name"] |
date | Date |
abstract | Description |
license | See: Creative Commons for options |
For the image_src value, you’ll need to find the URL for the image to paste into that field.
- Click on “Use this File on the Web”
- Copy the File URL (for example,
https://upload.wikimedia.org/wikipedia/commons/x/xx/FileName.png) - Paste the File URL in the
image_srcfield - Write alternative text for the image in the
image_altfield. If you’re interested, here’s guidance on writingalttags for complex images, like data visualizations.
When you’re done, you should have two new markdown (.md) files in a new visualizations folder, which itself is a subfolder of the content folder. The exercise files already include a template for rendering the visualizations (in /layouts/_default/single.html). If you need to, use the markdown files within the /papers/ and /posters/ folders as a reference while you build out the visualizations section of the site.
When you’re done creating the markdown (.md) files for the visualizations, you can test to see that everything is working properly by running the hugo server command in a terminal and opening a web browser to http://localhost:1313/visualizations/. Make sure that your terminal open to the static-web-scholcomm-exercise-files directory for the hugo command to work. If your terminal is busy from a previous process, you can stop it by entering Ctrl+C in the terminal and restarting the server by entering hugo server in the terminal.
Templates determine the structure and layout of web pages. In the exersice files, the templates are .html files within the layouts folder. Templates are an advanced topic with any static site generator. Not only do you need some basic familiarity with HTML and CSS, you’ll also need to learn the basics of whichever templating language the static site generator uses. However, this is a skill that pays off because it provides a new layer of control over your digital publications, opening up new pathways to work with more dynamic content.
Bibliographic metadata is probably the first reason to customize templates. Static site generators can support pretty much any semantic web metadata standard you can think of, but you’ll probably have to be the one to implement it since most themes have that template available.
But first, let’s start with the basic templating syntax in Hugo. Hugo is written in the Go programming language and uses the Go Template package. We don’t need to know anything about Go to starting making and editing templates, though.
As mentioned before, most of our site contents are expressed as either Markdown or YAML. These are the data that get fed into HTML templates when Hugo builds the site. The template files are in the layouts folder of our project (or in the layouts directory of a theme). Here’s a snippet of HTML code from /layouts/_default/baseof.html:
<title>{{ .Title }} | {{ .Site.Title }}</title>
This is the <title> HTML tag that is required for any web page. Within the opening and closing brackets, there are two placeholders: the title of the page and the title of the site. Each placeholder represents a variable.
The first placeholder
{{ .Title }}is a page variable. This value will change for every page in the website. In Hugo,.Titlealways refers to the title of the page, which is usually defined in the page’s YAML front-matter.The second placeholder
{{ .Site.Title }}is a site variable. This value will not change for every page; it’s the same across the entire website. The value is defined in thetitlefield of theconfig.ymlfile.
Let’s say that we’re on the Home page, and the website title is Conference Proceedings, the <title> on the website will render this:
<title>Home | Conference Proceedings</title>
Here’s a helpful video on templating basics in Hugo.
With templates, we can pull in any YAML or Markdown we need, wherever in our site we need them. Let’s give this a try by by adding Google Scholar metadata tags to our conference proceedings.
Task: Add Google Scholar<meta>tags to the<head>element of our HTML markup.
According to Google Scholar Indexing guidelines, the crawlers look for <meta> HTML tags containing Highwire Press tags, for example:
<meta name="citation_title" content="The testis isoform of the phosphorylase kinase catalytic subunit (PhK-T) plays a critical role in regulation of glycogen mobilization in developing lung">
<meta name="citation_author" content="Liu, Li">
<meta name="citation_author" content="Rannels, Stephen R.">
<meta name="citation_author" content="Falconieri, Mary">
<meta name="citation_author" content="Phillips, Karen S.">
<meta name="citation_author" content="Wolpert, Ellen B.">
<meta name="citation_author" content="Weaver, Timothy E.">
<meta name="citation_publication_date" content="1996/05/17">
<meta name="citation_pdf_url" content="http://www.example.com/content/271/20/11761.full.pdf">
- Create a new file in
/layouts/partials/calledgs-metadata.html - Copy the following code and paste it into the
gs-metadata.htmlfile
<meta name="citation_title" content="{{ .Title }}">{{ range .Params.authors }}
<meta name="citation_author" content="{{ . }}">{{ end }}{{ with .Params.doi }}
<meta name="citation_publication_doi" content="{{ .Params.doi }}">{{ end }}
<meta name="citation_publication_date" content="{{ .Params.date }}">{{ with .Params.pdf }}
<meta name="citation_pdf_url" content="{{ .Params.pdf }}">{{ end }}
Templates also allow you to loop over fields with multiple values and apply conditional logic. For example, the range function is used to iterate over a list of items, like authors. For each author, the template will create a new <meta> tag with the name="citation_author" attribute until all authors have been added. The with function is similar to if statements in other programming languages. In this example, with checks to see if the page has defined a doi in the YAML front-matter. If so, then Hugo will create a <meta> tag with the name=citation_doi attribute. Hugo has an extensive list of functions for creating templates.
Once you’ve created the file and saved the site, test it by running hugo server in a terminal and opening https://localhost:1313 in a web browser. Because we are editing web page metadata, and not web page content, we can see the changes we are making by viewing the source of the web page in our browser. You can view the source of any web page by right-clicking the page in your web browser and selecting the View page source option. The Google Scholar metadata we are adding to our demo website will appear near the top of the page when you’re viewing the page source.
This concludes the introductory tutorial on static site generators with Hugo. Congrats! The following sections are intended to provide guidance on publishing and archiving static websites in a real-world contexts.
Looking for more training and exercises? Check out the Getting Started with Static Website Generators workshop by Kaitlin Newson and Kim Pham from the Code4Lib 2018 conference.
Static site generators can build your website to a local or production server environment.
Local Environtment: This is sometimes called a development environment. When we’ve been previewing our site with the
hugo servercommand, we’ve been using the local environment. With this environment, thehugo servercommand turns our machines into mini web servers that host and deliver the website in our web browsers at alocalhostURL.Production Environment: When we’re ready to deploy the website online, we need to use a different command for a production server environment. With Hugo, this command is simply
hugo. Thehugocommand will create a new subfolder in your project calledpublicthat will contain all of the final HTML, CSS, JavaScipt, images, and other asset files (e.g. PDFs, datasets, etc.) you need to have a fully-functioning static website.
One of the primary differences between the hugo command and the hugo server command is how it handles URLs and permalinks. With hugo server, all of the URLs will be relative to a Base URL called https://localhost:1313 by default. The hugo command, however, will set all of your URLs and Permalinks according to whatver you set as the baseURL value in the config.yml file. The baseURL refers to the hostname and path address to your website. For example, if you purchased the https://example.com domain name for your website, this line would be in your config.yml file: baseURL: https://example.com. The baseURL can also be a subdomain (baseURL: https://conference.example.com) or a subdirectory of a website (baseURL: https://example.com/conference/).
While deploying to a production server can get complicated, we don’t need to worry about the server meeting specific software or operating system requirements. We just need to be able to upload static file to it. Here are some popular static website hosting options and some tips on using them:
GitHub is a platform for hosting Git repositories containing source code for software packages. It’s popular website for finding open source projects communicating with users of specific pieces of software. GitHub Pages is a free static website hosting service offered to users of the GitHub platform.
The following steps will show you how to move your website files to GitHub and deployed publicly on GitHub Pages. This is intended to demonstrate the process of moving a locally developed static website online; this is not a recommend workflow for static site deployments (more on that below).
In your Hugo Project Files
- Open the
config.ymlfile and add the valye for thebaseURLfield. Usehttps://YOURUSERNAME.github.io/conference-proceedings/whereYOURUSERNAMEis replaced with your GitHub username - Run:
hugoto build your site to thepublicdirectory
In GitHub
- Login to GitHub
- Create a New repository: Title menu
+>New Repository - Enter
conference-proceedingsin theRepository Namefield - Click on
Create Repository; this will display many options to add files to the repository - Click on the link that says:
upload an existing file - Upload all of the files within the
publicdirectory to the Github repository. It is important that theindex.htmlfile is at the root of your of repository. Do not upload the public folder itself; upload the files within thepublicfolder - Click on the
Commitbutton. This will upload your website files, which might take a few moments. - When the upload is complete, click on the
Settingstab - Scroll down to the
GitHub Pagessection - In the
Sourcedrop-down menu, selectmain, make sure that/(root)path is selected, then click save. - This will deploy your website to this URL:
https://YOUR_USERNAME.github.io/conference-proceedings
This is all you need to do to manually deploy a website using the GitHub Pages service. Static site generators, like open source software in general, make heavy use of the Git version control software. What we just did was intended to demonstrate a manual deployment of a static website to a public web server. As a reference, here’s what a more common workflow would look like:
- Create your website’s project folder:
hugo new site new-website-name - Change directories into the website folder:
cd new-website-name - Initialize a Git repository:
git init - Create and edit your website locally (just as we did earlier in this tutorial)
- Upload your local Git repository to GitHub:
git remote add origin https://github.com/YOUR_USERNAME/new-website-name.git
git branch -M main
git push -u origin main
- Set up an automated deployment workflow that pushes a new build of your website to a server with every change to the git repository on GitHub.
By storing your source code in a GitHub-hosted repository, you can deploy static sites directly to GitHub Pages or third-party services like Netlify for free.
The Hugo Documentation includes a lot of hosting and deployment recommendations. Many of these options have free tiers, but static website hosting usually only costs a few dollars per month.
Netlify is a web hosting company specializing in static websites. They provide free individual accounts, integration with GitHub, and numerous 1-click deployment options with popular static site generators. This is a typical workflow with Netlify:
- Set up a web project with static site generator on a personal computer
- Initialize a Git repository on the project
- Push a copy of the repository to GitHub
- Grant Netlify access to GitHub repositories
- Netlify copies the web project to their servers, build the website, and host the website
- Updates to web project get pushed to GitHub copy and automatically trigger new website deploys
Automating this workflow can take some time up front, it saves a lot of time over the course of updating the website. Netlify also provides Netlify Drop, which is an option to upload the pre-built website folder directlly (no Git/ GitHub integration necessary).
For deploying the conference proceedings website, run the hugo command and upload the /public/ folder to Netlify Drop to make the website available to the public.
Static websites themselves are not digital repository or preservation systems. They do, however, provide a few options for creating OAIS Submission Information Packages (SIPs). In fact, it’s possible that static websites are easier to archive than database-driven websites, as Rumianek (2013) writes:
Archiving CMS based websites proves much more difficult, because there may exist different views on the content depending on the browser and/or permissions of each user. Recovering a CMS based website from an archive generated by a crawler is not possible either, since the content archived by the crawler is affected by the crawler’s permissions and configuration, and only a single view is archived. Therefore, the database itself is not recoverable.
For static websites, there are two options: “downloading a copy of the files using a crawler, or, by getting a copy of the necessary folders containing all of the files from the site’s operator” (Rumianek 2013).
Web archiving tools like Archive-it can be set to crawl the public version of the website. This is a process where a machine visits the website and systemically creates copys of all of the files of the website. As the creator of a static website, you have more flexibility in creating an OAIS Submission Information Package (SIP):
Archiving the public website: Run the
hugocommand on your completed website, create a.zipfile of the/public/folder, and add it to a digital repository or digital preservation system.Archiving the source material: Create a
.zipfile of the entire static site project folder, including the content, layouts, and assets files, and add it to a digital repository or digital preservation system.